Easy, elegant do-it-yourself looks that will last you through wedding season...and beyond.
By: Stefania Sainato7. Woven Low Ponytail
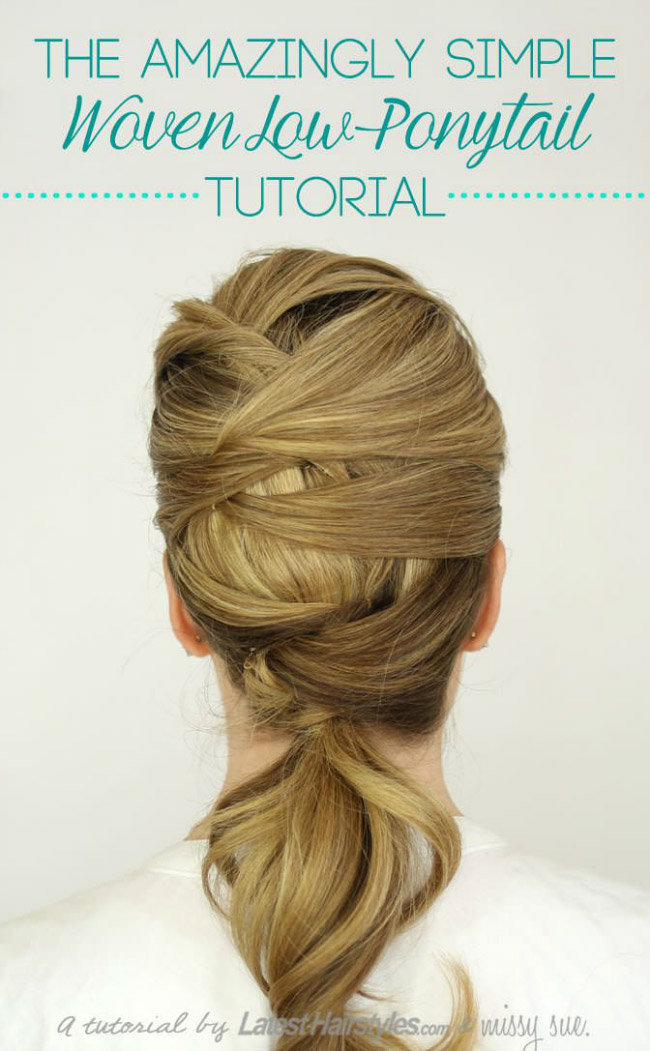
A classic ponytail will never go out of style but we're crushing on this fresh zig-zag style that screams black tie event.

Created by Missy Sue on Latest-Hairstyles.com
Get the Look:
1. Begin by taking a section of hair in a triangle shape from the right corner of the forehead and diagonally up from the left eyebrow.
2. Pull the hair to the back of the head and divide it into two halves.
3. Take the strand on the left and cross it over the top of the right.
4. Now pin down the section on the right side.
5. Take the hair next to the twisted section and lay it over the strands to hide the hair pin.
6. Next, take a section on the left side directly below the portion that was pinned.
7. Wrap it around the back of the head so it crosses over the first pinned section and slide a hair pin in to hold it in place.
8. Now, repeat steps 6 and 7 with a strand on the right side, crossing it over the previous section and pinning it in place.
9. Repeat these steps working all the way down the head until reaching the nape of the neck. You should end up with sections of hair crossing over the strand above it, creating a crisscross pattern.
10. Once you reach the nape of the neck, take a small section of hair from the right side and wrap it around the rest of the hair to create a low ponytail.
11. Wrap a clear elastic band around the entire ponytail.
12. Divide the pony into two sections and pull the strands in opposite directions so the elastic band slides up to the top.
13. Make sure the strand that was wrapped around the ponytail lays over the elastic band to hide it.
14. Finish by smoothing down any flyaways with hairspray.
Tip: Before crossing each strand over the back, spritz it with a hair wax and smooth it down with a comb to create a smooth look. Back-comb the top of the hair at the beginning to create a little volume at the top. Curl the ends of the hair with a curling iron to create a softer ponytail. Smooth a bit of dry Argan oil into the ends of the ponytail to hydrate rough ends.
Bonus: Watch the step-by-step video ►
Next: A twisted side ponytail ►


Comments
amelia22brown replied on Permalink
Blog