Wedding aisle vases are the perfect touch for your dream ceremony. They can transform the look of even the most basic church or add a pop of color to your outdoor setup. (Besides, it doesn't hurt to give the congregation a little eye candy to hold them over until you make your grand entrance.) But after splurging on centerpieces, bouquets, and more, many couples often can't afford to order aisle décor from their florist. This crafty version created by Dolci Odille for OnceWed.com only takes five steps to make—we couldn't believe the containers cost only $1!

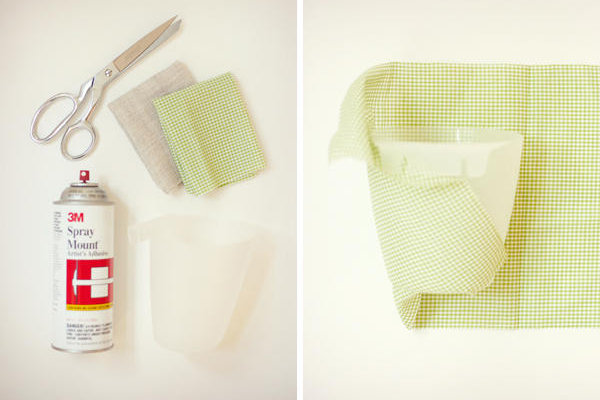
Materials:
- Bygel IKEA containers (only $1 each)
- Spray mount
- Fabric
- Twine
- Scissors
- Flowers

Step 1: Cut your fabric to fit the container.
Choose a festive fabric to complement your wedding theme and the flowers you plan to use to fill your aisle vase. Cut to fit your IKEA container accordingly (14" x 9).
Step 2: Spray your container.
Using the spray mount, go outside and spray the entire IKEA container. Make sure to spray a little on the inside rim as well.
Step 3. Wrap your container with fabric.
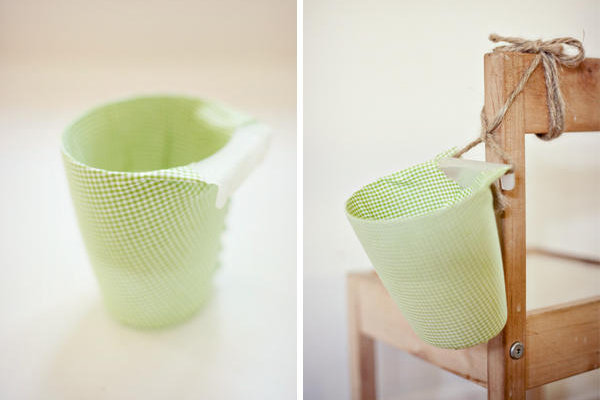
Take your fabric and tightly wrap it around your container. Make sure to press the fabric firmly against the container and smooth out creases and air bubbles. Tuck the fabric at the top inside the container. Then, cut off any excess in the back to make a smooth line.
Step 4: Attach twine to your container.
Add twine or ribbon by tying it around the “hook” on the back of the container.

Step 5: Add flowers!
The final step of this process is the most important. Whether you match your blooms to your bouquet or go with a different kind altogether, they will set the tone for your romantic celebration.

— Kelly McDermott
- ssainato's blog
- Log in or register to post comments


