Hair industry experts weigh-in on some of the best, easiest styles to DIY your wedding day ‘do!
By: Emily Goldman1. Old Hollywood Glam Bob
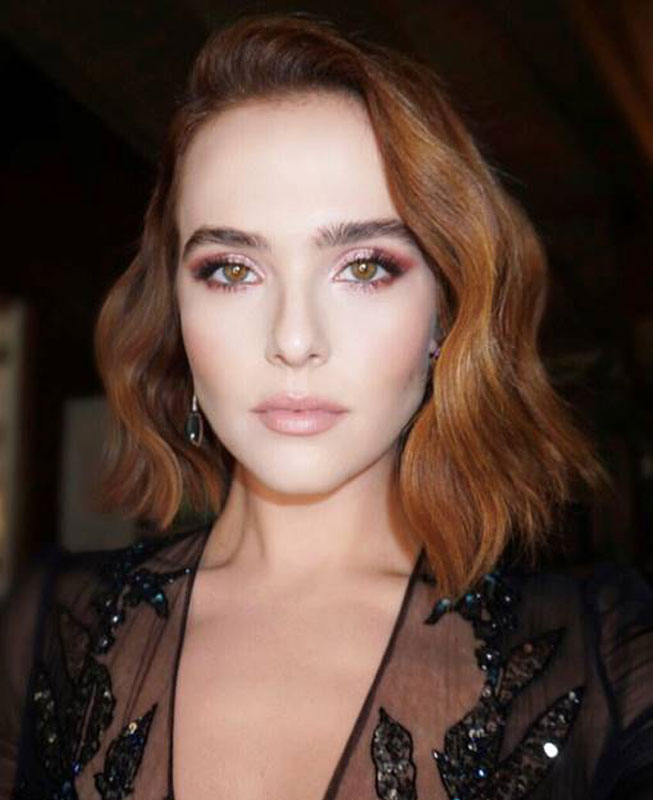
Style by Herbal Essences Celebrity Stylist Bridget Brager
How to:
-Start by washing your hair with Herbal Essences Sulfate-Free Honey and Vitamin B Shampoo and Conditioner, a long lasting hairstyle starts with a solid foundation and this has just the right amount of hydration to keep hair shiny and healthy! Added bonus – the shampoo is verified by the Environmental Working Group [EWG] for its clean formula
-On damp hair rack through a golf ball sized dollop of your favorite mousse, roots to ends
-Blow dry the hair smooth using a Boar Bristle brush
-Create a side part with a rat tail comb by following the highest point on your eye brow
-Next, heat up your T3 single pass 1” curling iron; Take one inch section of hair, hold the iron horizontally and near the scalp and begin to press in the barrel down, flipping the iron up and down as you move towards the ends of the hair. This is how you create a perfect wave pattern. Continue all the way around the head.
-Once complete use Herbal Essences Bio:Renew White Grapefruit & Mosa Mint Dry Shampoo at the roots to add some extra volume. To finish the look, spray a hair spray right onto your Mason Pearson’s bristles and smooth the hair into place. Your effortless look is ready to walk down the aisle!
2. Long Layered Waves
Style by Celebrity Stylist Anh Co Tran
How to:
-Prep hair with a soft mousse before using Sultra’s Airlight Dryer. The dryer is key to achieve a smoother, healthier shine
-To add extra volume and give texture like Constance Wu’s look, use Sultra After Hours Collection 1-inch Titanium Styling Wand and Sultra After Hours Collection 1.5-Inch Titanium Styling Wand
-Use the After Hours Collection THERMALITE™ Style, Wave & Straighten Iron to polish the ends, but keep it semi-wavy
-Brush waves out and pin the deep side part for some structure.
3. Half-Up/Half-Down Top Knot
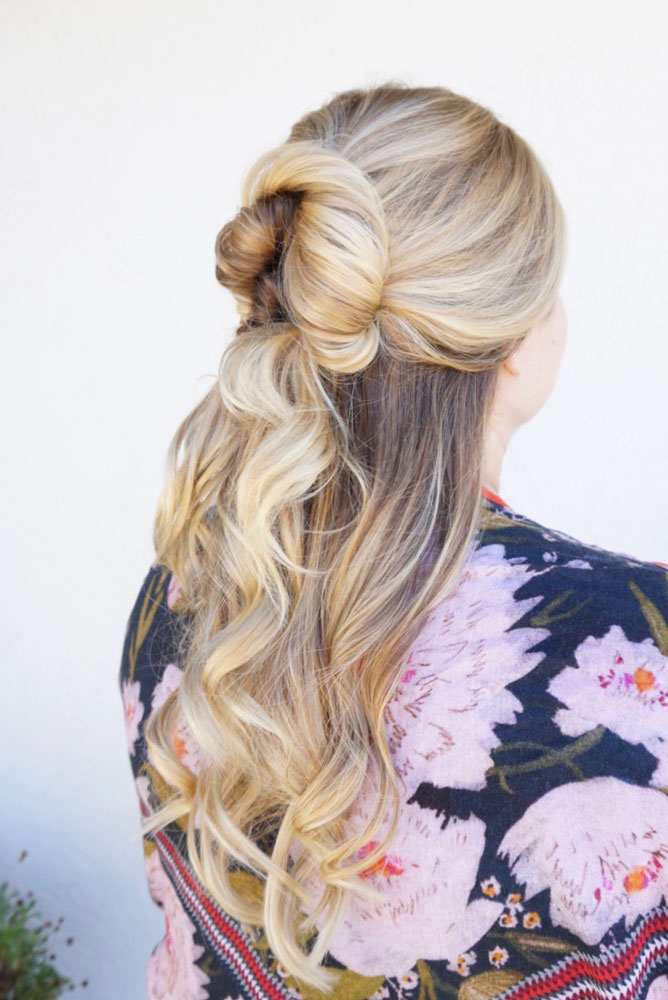
Style by Independent Consultant, Hair and Makeup Artist Samantha Sabato for Arbonne
How to:
-Start look with clean and conditioned hair using Arbonne True Hair Shampoo and Conditioner
-Follow up by smoothing Arbonne True Hair Leave-in Treatment through towel dried hair before blow drying
-Section hair into four sections starting at top. Leave the bottom section from the nape down
-Securing the top two sections with a clip, take the third section from the temples back by pulling loosely and twisting to the left and pulling at twist to create volume in it. Secure with pins
-Take the second section along the crown and pull loosely back, twisting to the left
-Pull at the twist to create volume in it and secure with pins above and slightly to the left of the first twist
-Take the top section, pulling back loosely and twisting to the right, pull at the twist to create volume in it. Secure with pins above and to the right of the first two twists
-Allow any hair to frame face for a romantic feel and pull at the secured twists to create anymore volume as desired
4. Romantic Waves
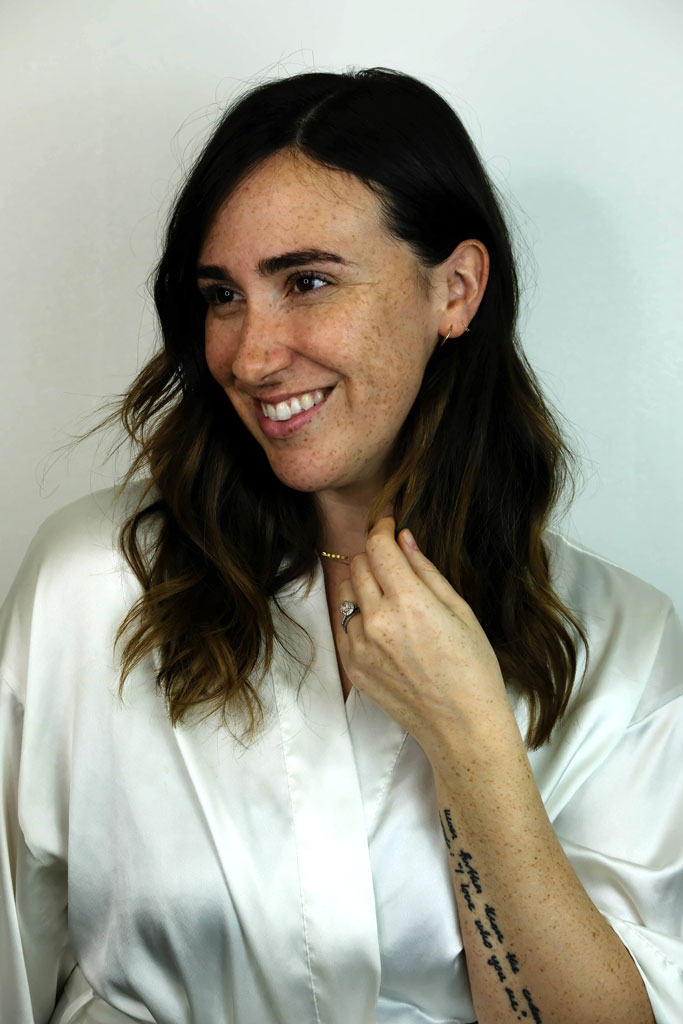
Style by owner of Pax Angeli salon in Los Angeles, Mikhayela Curry
How to:
-Start with clean hair
-Curl everything away from your face, leaving ends mildly straight
-Lightly run fingers through hair
-Tuck desired side behind ear
5. Textured Bun
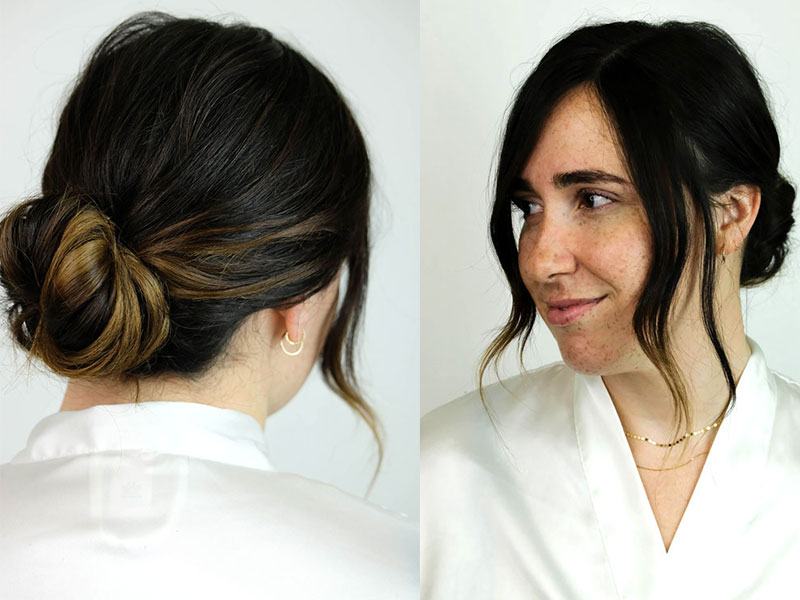
Style by owner of Pax Angeli salon in Los Angeles, Mikhayela Curry
How to:
- Start with wavy hair
- Spray texture spray at root for added volume
- Twist hair half up and secure with a bobby pin
- Twist all hair into a bun
- Secure with another bobby pin
- Take out pieces from front to modernize it a bit
6. Totally Twisted Low Bun
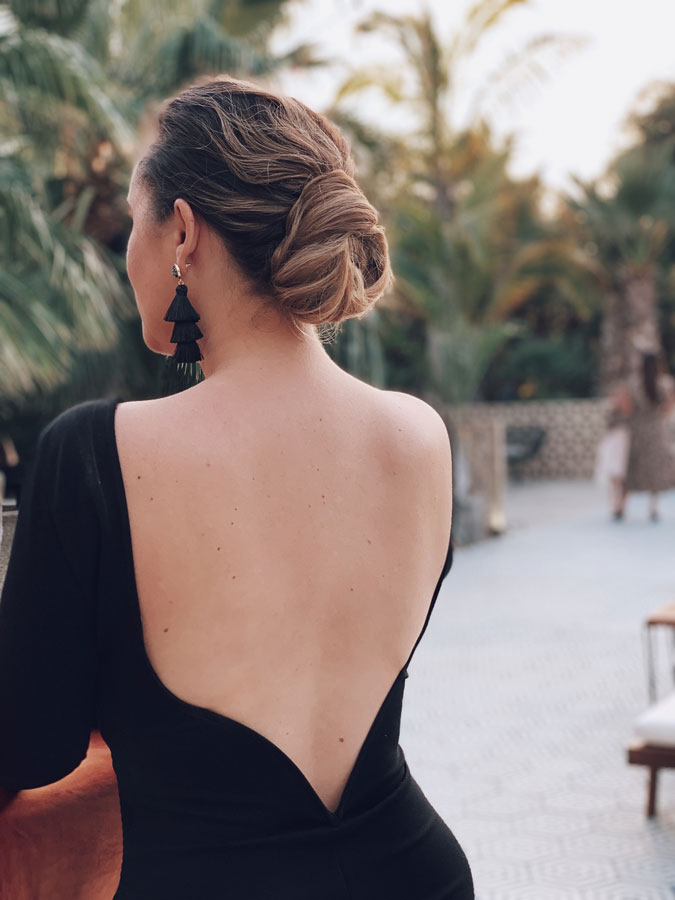
Style by Michael Dueñas
How to:
-Start with dry hair
-Apply Leonor Greyl Voluforme to the roots
-Apply Aloxxi Volumizing whip all over for definition
-Section the top of the head off in a horseshoe-shaped section above the rounds of the head
-Gather hair under the round of the head into a low ponytail and secure with an elastic
-Using a small curling iron, create loose waves on the top of the head with random sections
-Backcomb the root on the top of the head to desired volume
-Rake your fingers through your hair to break up the waves and smooth a bit
-Bring the top section of your hair down into the back, and join it with your lower ponytail, making sure to keep the volume on top
-Using your curling iron, take large sections and add a slight wave to your ponytail
-Take the ponytail as one section, and wrap it up to the hair tie securing the hair, creating a U shape
-Wrap the ends over the elastic and bring them through the U
-Secure with hairpins
-Smooth the ends of the ponytail to fall seamlessly in to the U shape you created and pin
-Finish the entire look with Evo Miss Malleable Flexible Hold Hairspray
7. Accessories Galore
View this post on Instagram
Style by Nexxus Style & Trends Curator, Lacy Redway
-Use your natural textures and pin your hair in every which way
-Then add a cool brooch, hair pins, headband, hair clips or flowers to accent your dress
8. Plaited Bun
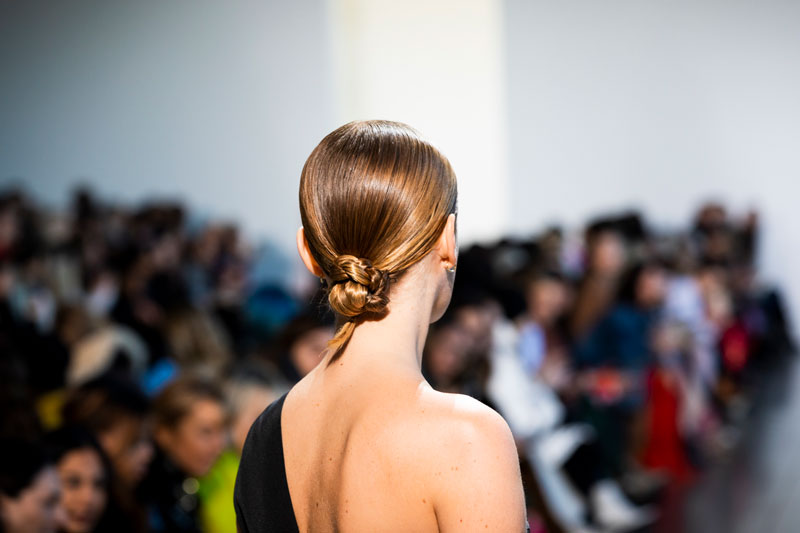
Style by Jimmy Paul using Bumble and bumble for New York Fashion Week Self Portrait Runway Show
How to:
-Begin with Bumble and bumble Thickening Spray
-Spray it liberally, and make a clean center part
-Use Bb.Gel to smooth the edges
-Bring the hair into a low pony, then braid
-Wrap the braid tightly into a chignon
-For more attitude, pull the tail of the braid out
-Finish the look with Bb.Does It All
-For naturally textured hair, smooth strands with Hairdresser’s Invisible Oil Heat/UV Protective Primer
9. Perfect Pony
View this post on Instagram
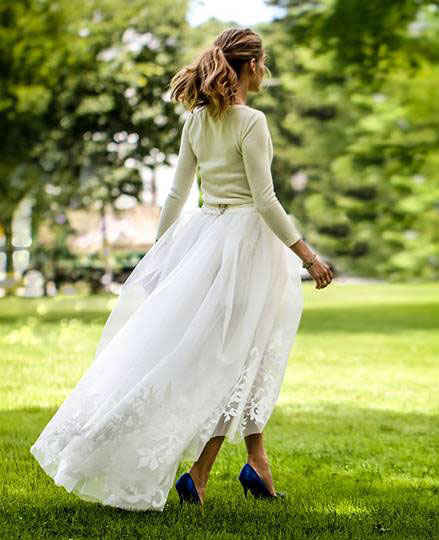
Style by Nexxus Style & Trends Curator Lacy Redway
“A fun, non-traditional DIY hairstyle is a ponytail like this one I gave Olivia Palermo on her wedding day. It’s timeless and something you can look back on forever without regret!"
How to:
-On damp hair, add a little of Nexxus Mousse Plus Volumizing Foam and rough dry while also scrunching the product into hair. This method should start texturizing your hair. For maximum volume, blow dry with your head upside down
-Once hair is completely dry, gather into a hair tie and use a 1.25” curling iron (iron size varies with hair length) to create elegant, loose waves into the ponytail
10. Low Knot
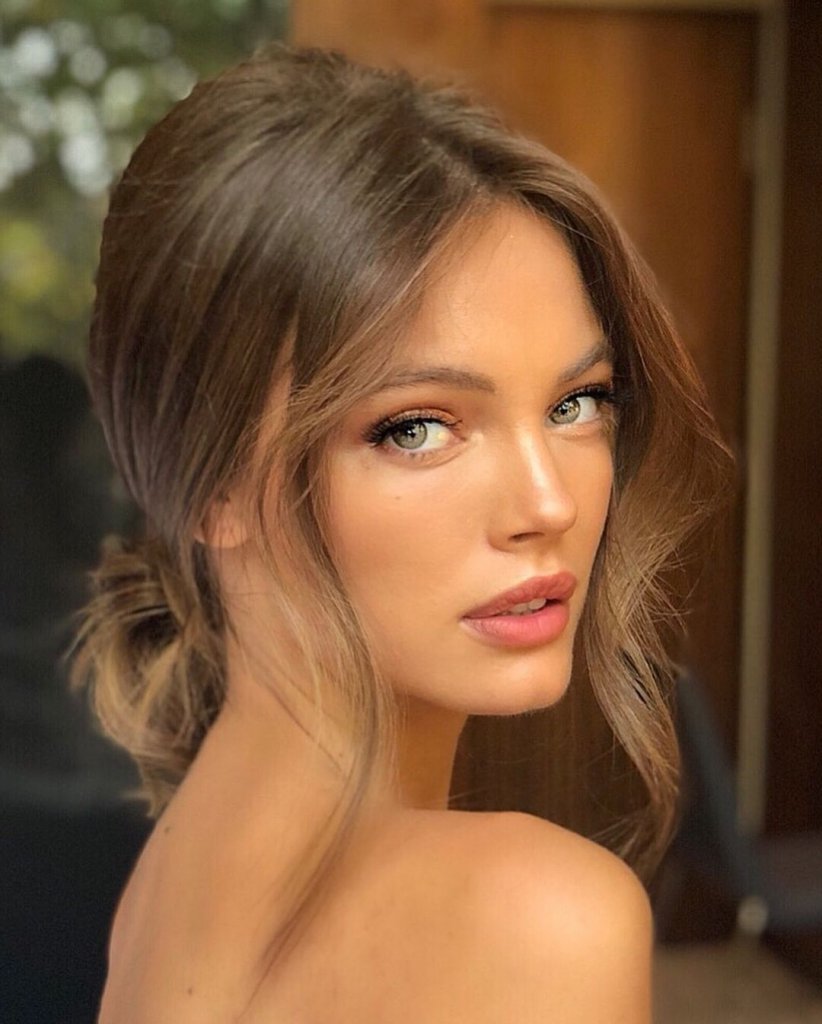
Style by Head & Shoulders Stylist Sunnie Brooks
- I always ask my brides to start prepping their look the morning of in the shower. To keep frizz at bay for 24 hours I suggest using Head & Shoulders Smooth & Silky Collection. It gives you a healthy scalp and leaves the hair soft and manageable for any wedding look
- Start by parting the hair down the middle and blow drying to create a lift in the crown
-Use a flat boar brush for added shine and to smooth curls or waves. Pro tip: If you want smoother hair, use a flat iron
- Leaving a few sections out around the hairline or face, pull the remaining hair back low at the nape and secure with an elastic
- Gently pinch and pull the hair at the crown to keep volume and fullness
- Fold the hair into a loose low chignon and secure with a few bobby’s
- Take a 1 1/2 inch curling iron on medium heat and wrap loose ends for a soft bend
- Lock your look in with a strong hold hairspray and light shine spray
11. Boho Half-Up Half-Down Braid
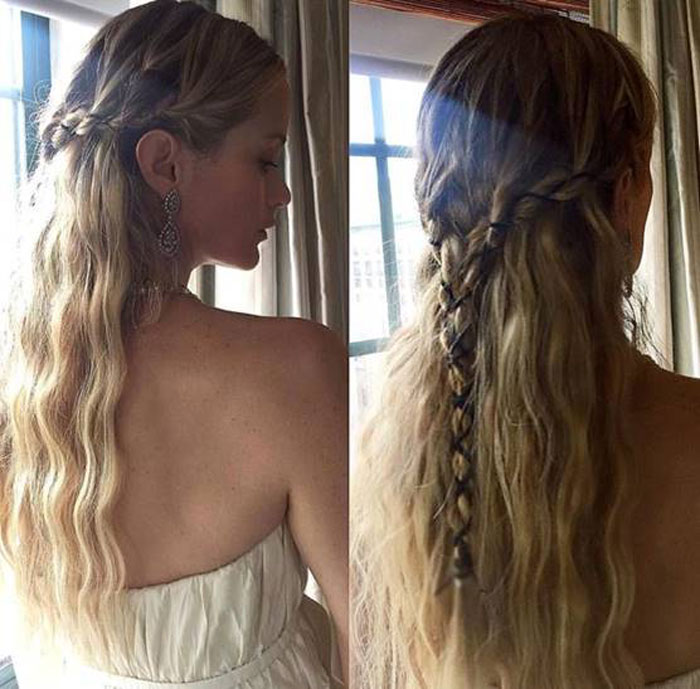
Style by Hair Food Celebrity Stylist Rebekah Forecast
- Prep the hair with Hair Food Sulfate Coconut Milk & Chai Shampoo and Conditioner
- Blow out with a little volume and retain any natural movement
- Use more of a twist than a braid on the sides – use the three sections like a braid, picking up on both sides but one side goes over and one under
- Join both braids together and continue down the back
- Add the twine as the last touch by following the twist shape. This way you can make sure that the twine is visible in the right place. If you braid it in as you go, you will find it gets lost on the inside of the braid. You can use a hook and eye to help thread the twine through.
