Get crafty with these creative, wedding-worthy Mason jar design ideas.
By: Lauren Elise DonaldsonTreat Jar Escort Cards
Difficulty Rating: Easy
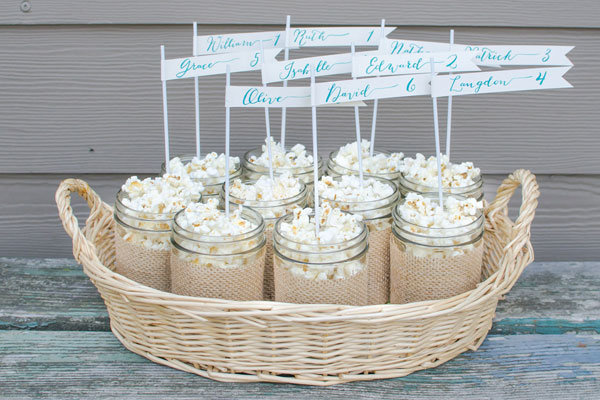
Direct guests to their seats in a sweet way with these Mason jar escort cards. Everyone is sure to appreciate treats to munch on throughout the night and the jar is a practical way for your guests to transport their leftovers home. Popcorn is an ideal snack. Set up a popcorn bar where guests can sprinkle their favorite toppings over their popped kernels, like butter, cheese, salt, rosemary, sugar, cinnamon, and chocolate, to name just a few. Other possibilities for filling up the Mason jars include candy, chocolates, marshmallows, cookies, or berries. Little sweets are sure to be a big hit at your wedding.
Materials
Watercolor paper or cardstock
X-Acto knife
Scissors
Metal ruler
Cutting mat
Watercolor paints
Inkjet printer
Printer paper
Thin paintbrush
Wooden skewers
Butcher paper
White spray paint
Double-sided tape
Burlap
Hot glue gun and glue sticks
Pint-size Mason jars
Popcorn or candy
Font Used: Bombshell Pro by Emily Lime
1. To make the name tags, cut the watercolor paper into 3⁄4 x 6-inch pieces. You will need one tag per guest. For precise cutting, use an X-Acto knife and metal ruler and do your work on a cutting mat. Scissors will also work.
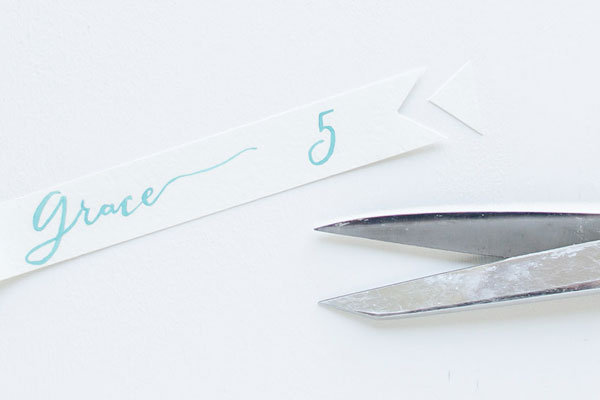
2. Use watercolor paints to write out guest’s names and table numbers on each of the tags. If you are uncomfortable with your own handwriting, choose a favorite font and layout names on the computer (use software like Adobe Illustrator or Photoshop or Microsoft Word). Print out the names and then use this as a guide while you paint.
3. Notch out a little triangle from the end of each tag.
4. The wooden skewers should be about 10 inches long. Cut them down if necessary. Lay out the skewers on butcher paper and spray-paint them white. Turn them over and spray the opposite side. After applying full coverage allow the skewers to dry.
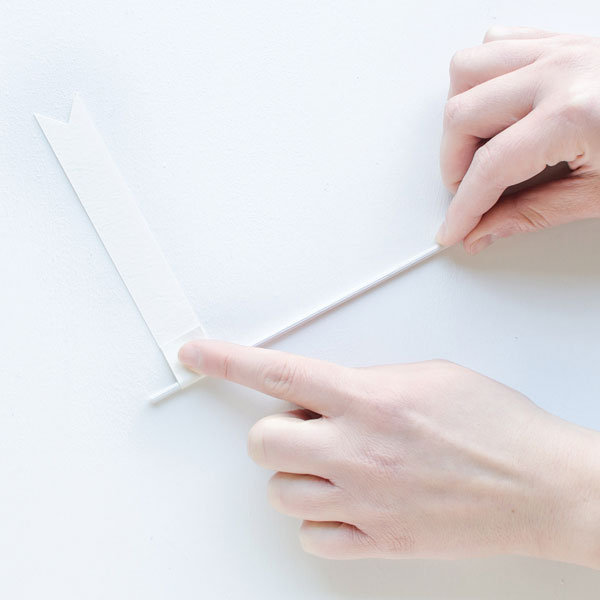
5. Put a strip of double-sided tape onto the end of a flag. Wrap this end around the top of a skewer and secure to the back of the flag. Repeat this for all of the flags.
6. Remove the metal bands and lids from the Mason jars.
7. Cut the burlap into 12 x 3-inch strips, one strip per jar.
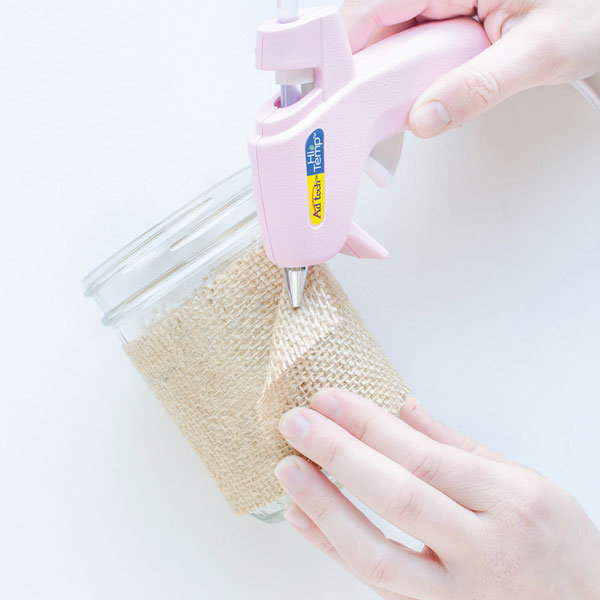
8. Hot-glue one end of the burlap to the jar. Wrap the burlap around the jar and then glue down the opposite end. Repeat this for each jar.
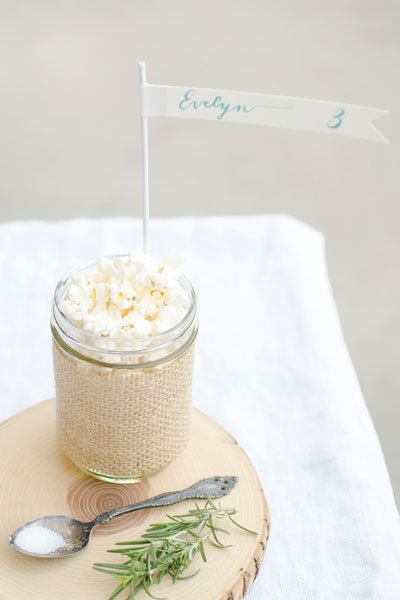
9. Fill each jar with treats along with a flag to act as a guide for guests to find their seats.
Extra Tips
For more of a personal twist, try painting your own calligraphy or request the assistance of a talented friend.
Another option for a wedding is to use these jars as take-home favors. Instead of spelling out guests’ names across the flags, write the name of the bride and groom, their initials, or their wedding date.
Adapted from Mason Jar Crafts—DIY Projects for Adorable Gifts, Rustic Decor, Clever Storage, Inventive Lighting and Much More, by Lauren Elise Donaldson (Ulysses Press 2013).

