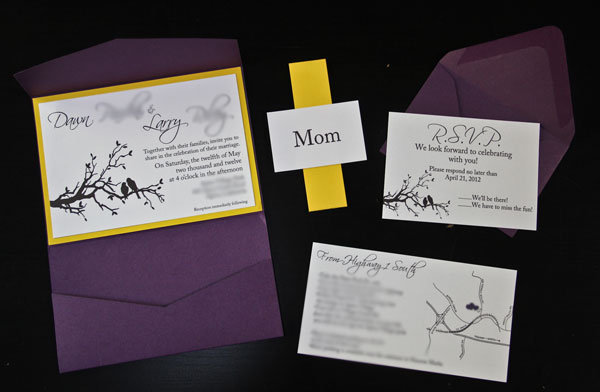
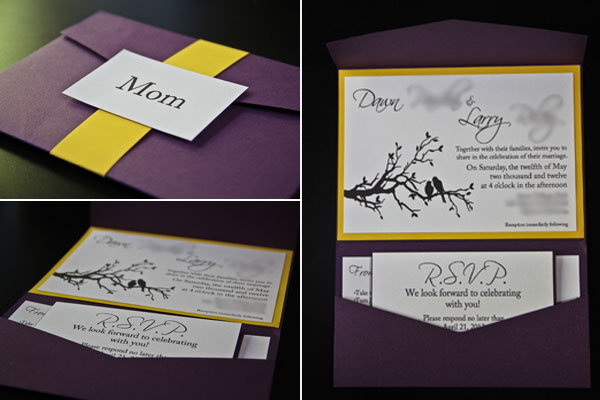
When real bride Dawn Nicole left a comment on our Facebook wall, telling us that she fully designed and printed every paper product for her wedding, we knew we had to meet this girl and get her story. And boy, we weren’t disappointed—her photos and DIY prowess may just inspire you to ditch your paperie and make your own one-of-a-kind wedding invitations.

Like most great ideas, this one was born because Dawn wanted something out of the ordinary that thousands of other brides haven’t already used. She personalized her invite with nametags, which helped her avoid having to use twice the amount of envelopes, since one set is traditionally addressed to the guest. Dawn is having a garden-style wedding and getting married in a large park, so she wanted to pick a complementary design motif. “We chose a ‘love birds’ theme because it has such a sweet feel. Plus, we plan on planting a ‘unity’ tree during the ceremony and having a ‘wedding tree’ for our guest book. It just fit!”
After 10 hours of Googling real brides’ invites, she decided on a sans serif font with big loops in cursive for her casual affair. That, along with selecting the wording took her longer than actually making the invitation: “I was literally sending out messages on Facebook that said, Should I write ‘cannot wait’ or ‘cannot make it’ on the RSVP cards? What do you guys think? I probably drove my friends nuts with all the options!” (Check out our guide to invitation wording, if you’re stumped like Dawn was.)
Once that’s settled, you can start purchasing materials. Dawn recommends cardsandpocket.com, which is where she bought hers. You need to have some knowledge of a Word program of Photoshop in order to handle the formatting, but other than that, this project just involves a lot of cutting and measuring. “Most people, alone, or with the help of a computer-savvy bridesmaid can pull this off no problem,” said Dawn. She plans on enlisting four of her nearest and dearest to assemble the finished product.
The Grand Total: $91 for 45 invites, or $2.02 a pop. “I never did get a quote from another company for this style, so I really have nothing to compare it to, but I think that’s a pretty good price!” said Dawn.

Materials:
- Pre-made pocket fold cards
- RSVP envelopes
- Mailing envelopes
- White card stock
- Yellow card stock (This will serve as the back mat and belly band)
Steps:
- Lay out the design in Photoshop or Word to the exact sizes that you need to fit the pre-made folded card. This includes the actual invitation, RSVP card, directions card, nametags on the belly band and the save the date.
- Print each paper element in black and white ink (you can use a home printer) and then cut them out to size using a paper cutter.
- Assemble the invitation suite.
P.S. Budget-savvy brides, have a DIY project that you think will knock our socks off? Submit a brief description with photos to [email protected] and you could be featured in an upcoming "DIY We Love" blog post!
P.P.S. Leave a comment below if you have any questions about how to complete this craft.
—Stefania Sainato
- ssainato's blog
- Log in or register to post comments


